The subscriber profile page is the page where subscribers can edit their data (name, address, lists, and so on).
That page is autogenerated by Newsletter but you can control every text displayed (and translate or adapt it), add an introductory message, or even define a custom profile page using a dedicated WordPress page (for advanced users).
What's inside
- The standard profile page and form
- How to use a custom page
- Advanced: fully customized profile page
- Custom profile form
- Status change on profile saving
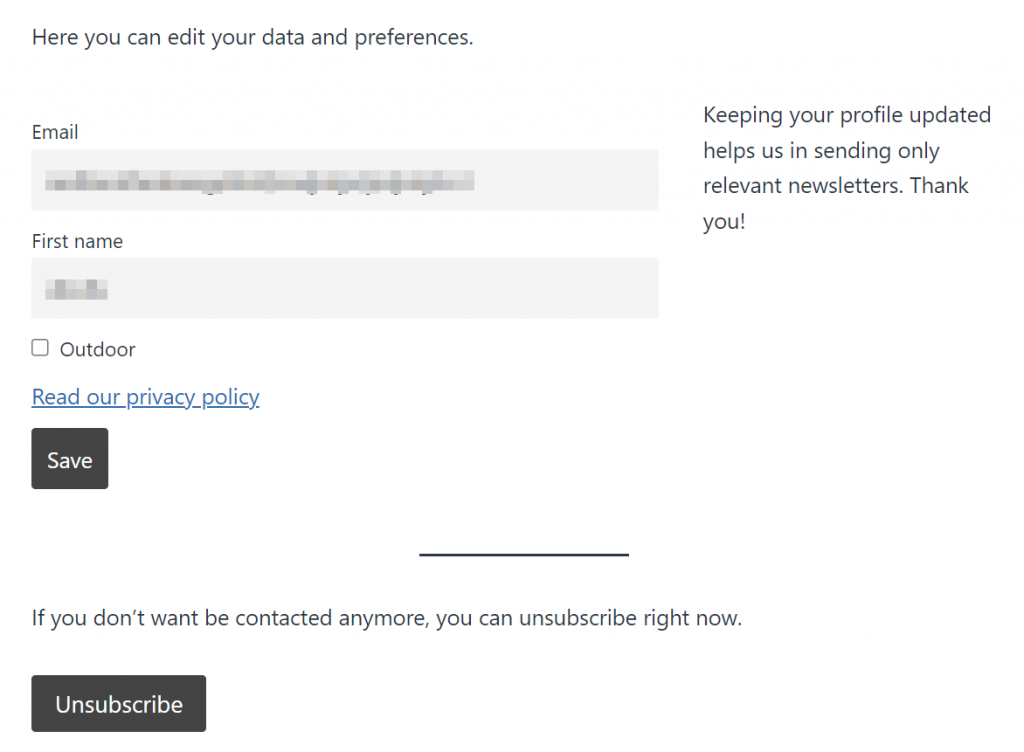
The standard profile page and form
The standard profile page is the recommended choice: it works out-of-box without special configurations.
The profile editing form is shown on the Newsletter’s public page when the subscriber clicks on the profile management URL present in your newsletters (usually added with the “footer” block).
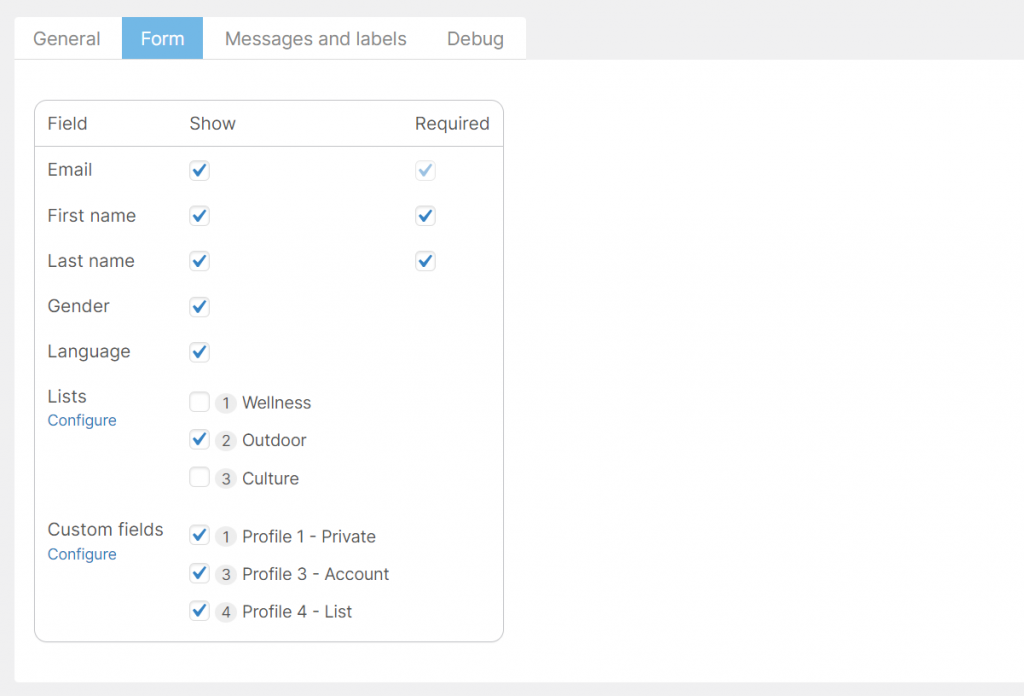
The editing form can be configured by selecting which fields should be shown (name, lists, custom fields, …).
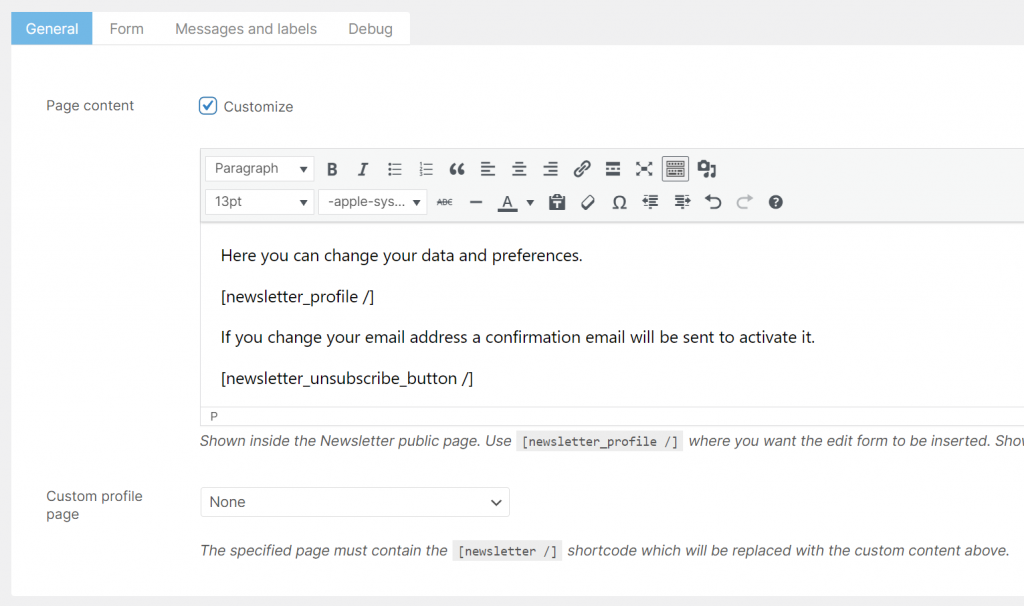
If you need to add custom text, you can edit the content of the profile page (not the Newsletter’s public page, which must contain only the [newsletter/] shortcode).
The custom content must contain the [newsletter_profile/] shortcode which is replaced by the editing form. Other shortcodes can be added, both related to the Newsletter plugin (like the unsubscribe button shortcode) or provided by your theme and installed plugins.
How to use a custom page
If you need to have a dedicated page for profile editing (for example because you need a special theme template or layout or just the URL), you can create that page set as content only the [newsletter/] shortcode and set it on the custom page configuration.
The Newsletter plugin will take care to send the subscriber to that page to edit its data and will render the page content as configured.
Advanced: fully customized profile page
This is an advanced topic and this setup could result in unwanted behavior on the profile page if not configured with care.
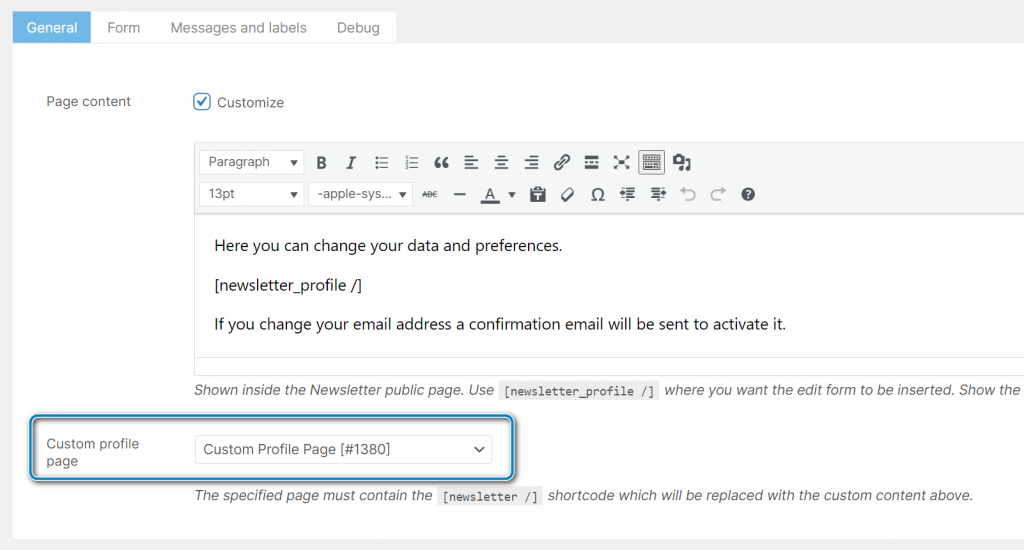
The first step is to create a custom profile page, as explained in the previous paragraph, and set it on the profile page configuration.
The page can be fully edited with Gutenberg (or any other editor) adding the preferred structure and content. The only required thing is the [newsletter_profile/] shortcode so the editing form can be displayed on the page.
Here is an example of the content of a fully customized profile page while editing it with Gutenberg and the default WordPress theme.
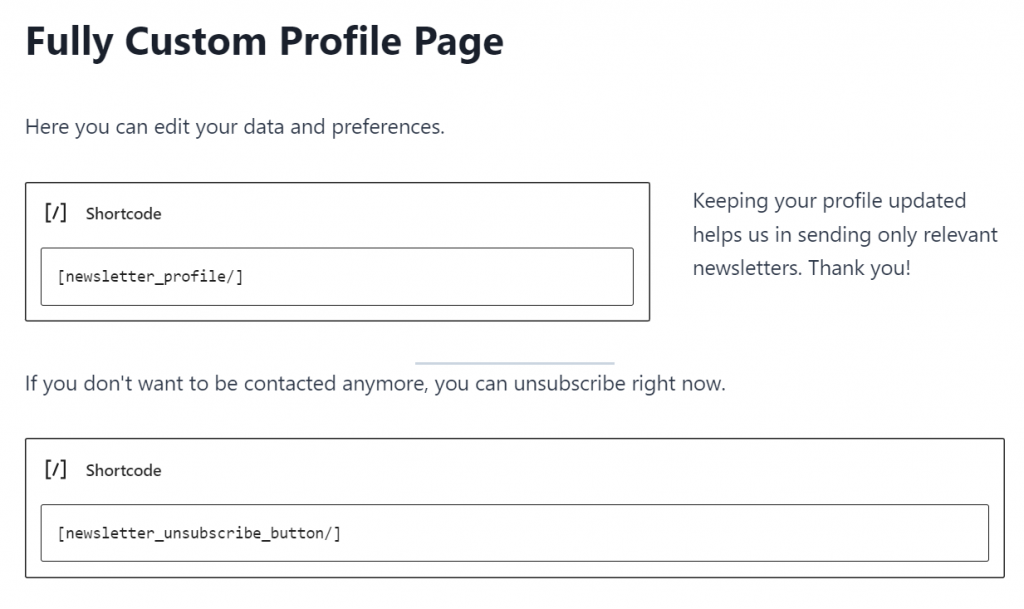
And this is how it is rendered:
Custom profile form
The profile form generated by the Newsletter plugin is well-structured and work on almost all themes.
In some special cases, there is the need to have even more control over the fields, usually to build special layouts. That is where the [newsletter_profile_field] shortcode comes in.
The general use is this:
[newsletter_profile]
[newsletter_profile_field name="email"/]
[newsletter_profile_field name="first_name"/]
[newsletter_profile_field name="lists"/]
[/newsletter_profile]
The [newsletter_profile] shortcode must be closed with [/newsletter_profile].
The available field names are:
- first_name
- last_name
- gender
- language
- lists – shows ALL the list checkboxes as configured for the standard profile form
- customfields – shows ALL the custom fields as configured for the standard profile form
- customfield – show the custom field selected by the attribute “number” (see below)
All fields accept the attribute label (except customfields and lists).
[newsletter_profile_field name="first_name" label="Your first name"]If you want to render a field without the label, you can set an empty label:
[newsletter_profile_field name="first_name" label=""]To use a custom field, you need to provide the number of the custom field and it will be rendered according to its configuration (text, list, …).
[newsletter_profile_field name="customfield" number="3"]Email change
When the subscriber changes its email, a confirmation email is sent and the new email is kept apart until the confirmation is completed.
Status change on profile saving
When a subscriber enters his profile page and saves the data, her status is changed to confirmed (if it was not confirmed).
Saving the data is a confirmation of her profile and her subscription. This is useful eventually for those campaigns you run to ask for confirmation of imported subscribers when you want them to review their profiles.