Integration of The Newsletter Plugin with other systems using Zapier is extremely simple. You can use our Zapier app, which makes it really easy to connect your site-running Newsletter with every other service available on Zapier. If you’re a Zapier master and prefer to write your own integration, you can use our APIv2 reference.
We assume you’re already experienced with Zapier. If you need to know more about Zapier actions, triggers, and zaps, please see their video tutorials.
On Zapier, you can find two apps to send data to your site: The Newsletter Plugin app and The Newsletter Plugin 2.0 app. The latter is recommended.
To access the apps, you need an invitation link:
- Access to the original app
- Access to version 2.0 app (recommended)
In version 2.0, data could be structured in a different way than shown in the next paragraphs, but it should be quite easy to adapt.
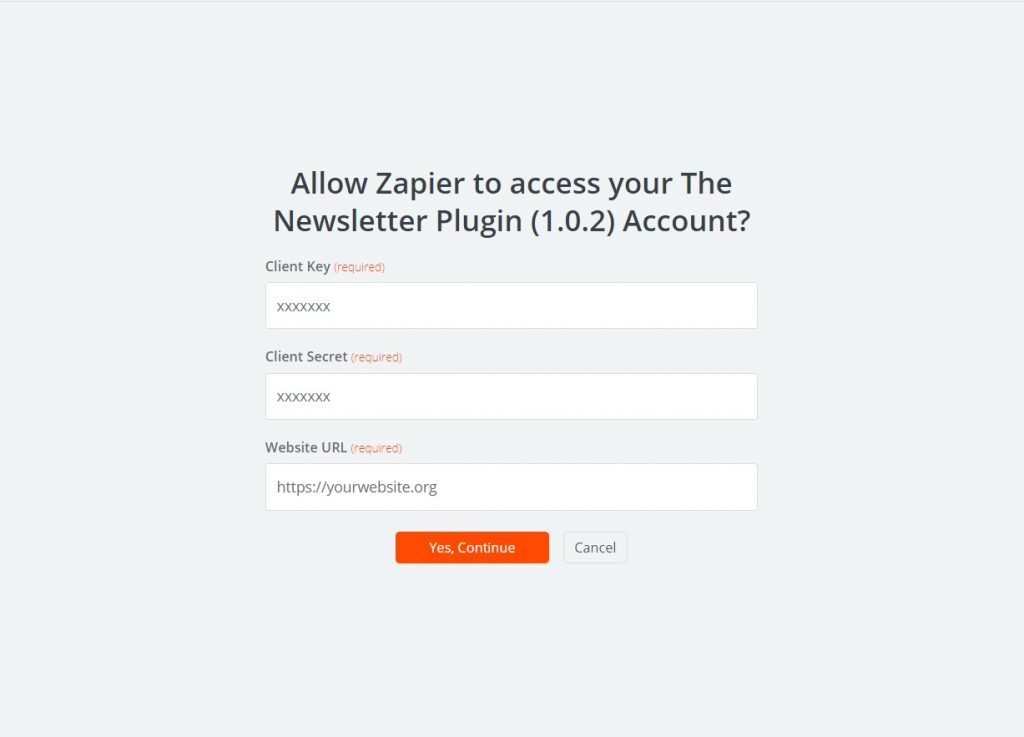
Attention: the Zapier authentication steps requires a username and a password. You must enter the Client Key and the Client Secret generated with our API addon.
A Zap to add or update a subscriber
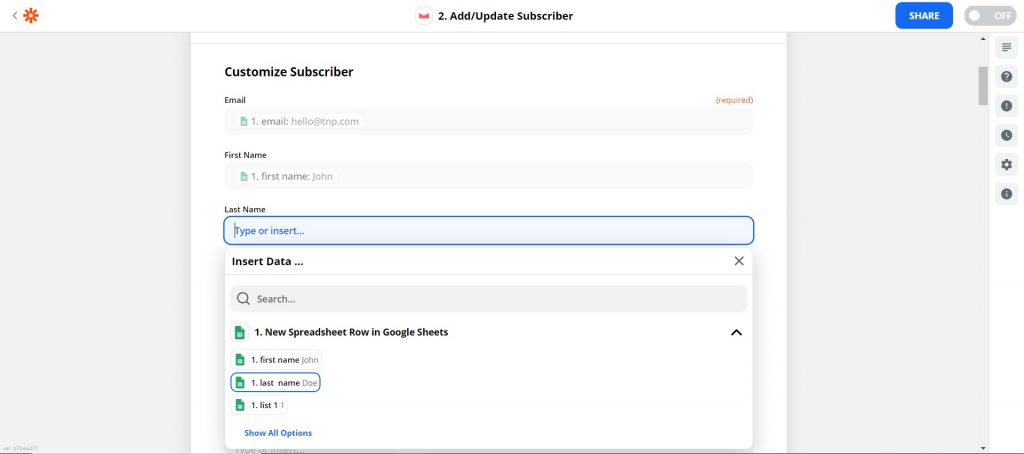
In this example, we start using a Google sheet as the data source of subscribers to be added to your site. We see in the screenshots below how to map the Google sheet columns to the subscriber’s fields.
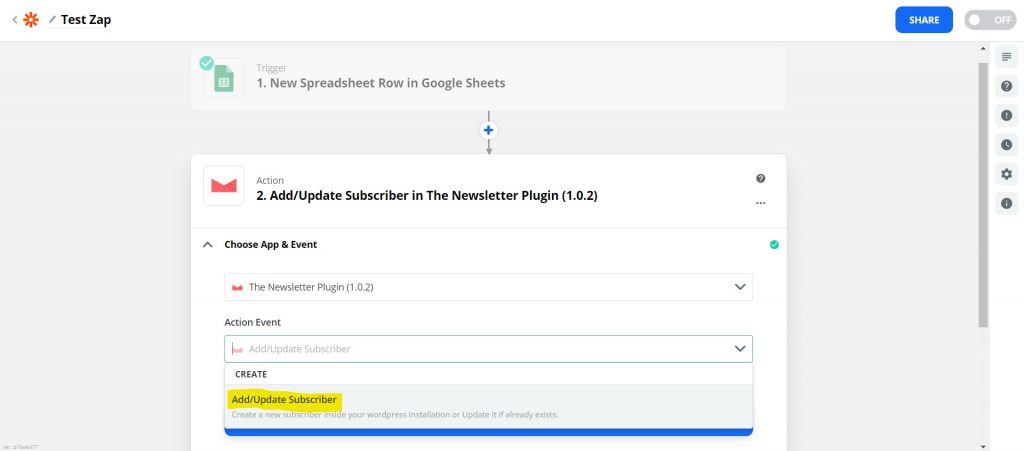
Once you add the “The Newsletter Plugin” app, you should select the action Add/Update subscriber. In the upcoming version, you may find more event actions.
If the Newsletter app cannot be selected (grayed out), select a different app and then use the change button to change it to Newsletter. We’ve been reported this workaround works!
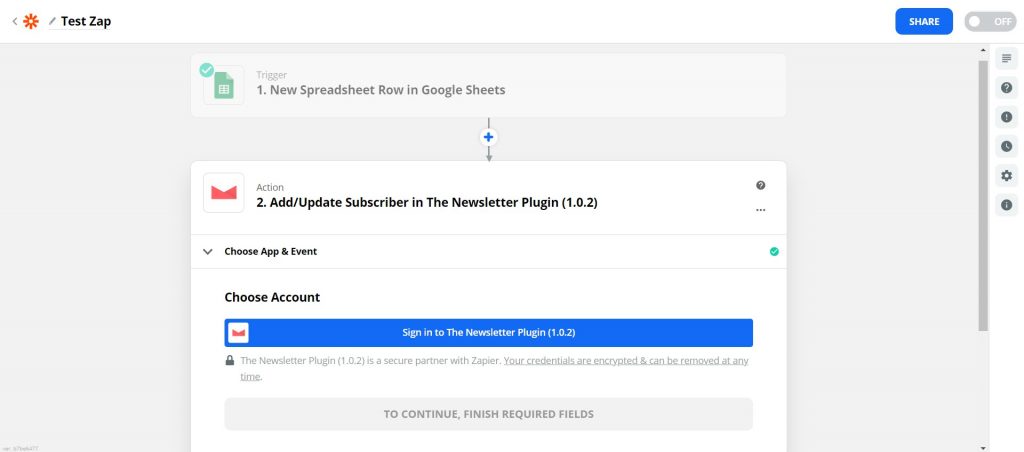
Then you need to actually connect the app to your blog, where you’re running The Newsletter Plugin and the Newsletter API version 2 addon.
Remember you need to generate the API keys.
Insert the keys and your website URL.
Once the connection is working, you can start mapping the source data (in our case columns from the Google sheet) to subscriber fields provided by our app. Of course remember to map at least the email address.
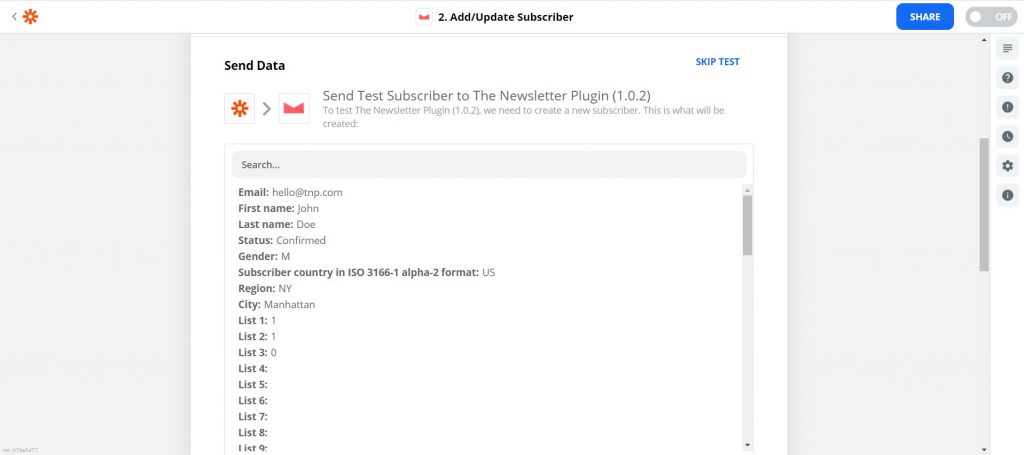
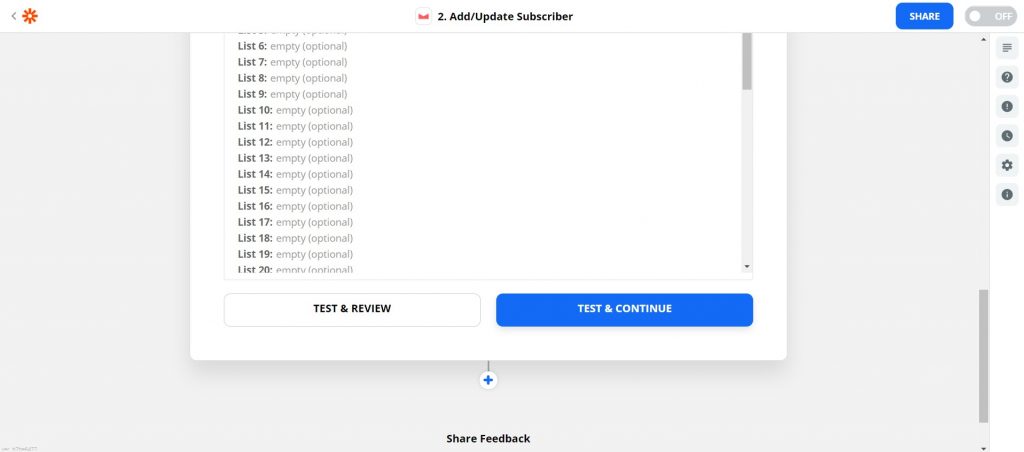
Once you mapped your relevant fields, you can run a test with the first Google sheet row.
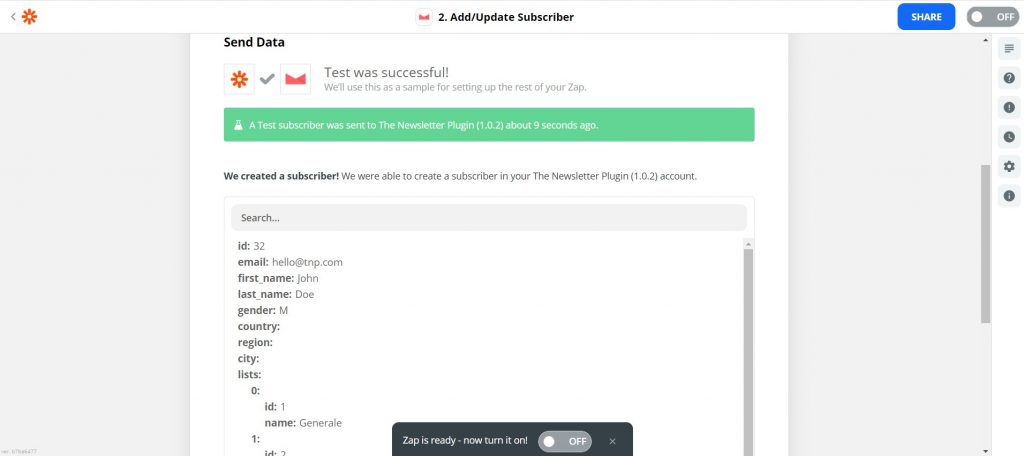
If the test is successful, you get back the created subscriber profile (note that it contains the subscriber ID). Now it’s time to active your shiny new zap!
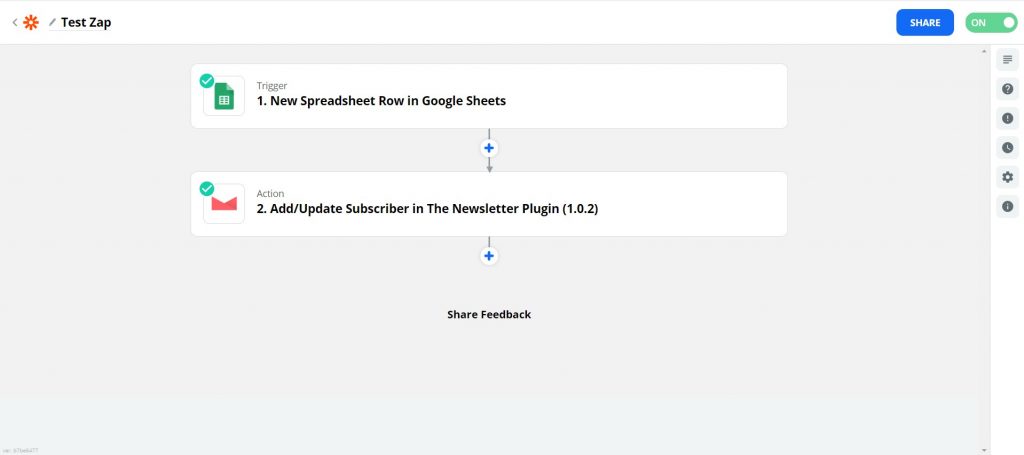
Done! You should see the “on” switch in green color.
Please share you experience with Zapier and Newsletter with me at stefano[at]thenewsletterplugin.com