The Newsletter plugin provides a number of tags or placeholders you can use to inject subscribers’ data, dynamic URLs, or forms on pages or newsletters. Examples are the subscriber’s name or the personal cancellation URL.
They’re written as {tagname}, like {name} (the subscriber’s first name) or {email_url} (the link to the newsletter online version).
Let’s start exploring them all!
What's inside
- How to use URL-generating tags
- General tags
- Subscriber-specific tags
- Empty name fallback
- About profile fields tags {profile_N}
- About the {date_NNN} tag
- Salutation according to gender
- Subscription, cancellation, profile page URL tags
- Company information tags
- Forms
Tags can be used on messages, subjects, and on-page texts (configurable from the subscription panel). Of course, not all tags make sense in every place or every context. For example, a subscription confirmation tag has not much sense in the welcome message (sent when the subscription is already confirmed).
Newsletter tags can not be used on posts or pages, they don’t work! They work only when the text is manipulated by Newsletter, for example while creating the final email or the final message to be displayed to the subscriber.
Many tags are subscriber-linked so they need a subscriber set of data to be generated. Clearly the {name} tag needs a subscriber, but even the {subscription_confirm_url} needs it, since the generated URL contains the subscriber’s keys.
How to use URL-generating tags
Some tags generate an URL with the subscriber’s private token to access his profile or to start some kind of action like activation or cancellation. If you write directly the HTML code, the tag should be used in this way:
<a href="{unsubscribe_url}">To unsubscribe click here</a>
if you use an editor, just select the word or phrase you to become a link, press the link tool and use the tag as URL.
General tags
{blog_url}– the blog URL, like https://www.thenewsletterplugin.com{blog_title}– the blog title as configured on the WordPress general settings{blog_description}– the blog description as configured on the WordPress general settings{date}– the current date (not time) formatted as configured on the WordPress general settings{date_NNN}– the current date formatted as specified by NNN which is a sequence of characters compatible with the PHP date() function specifications{email_url}– the URL to see the current newsletter online
Subscriber-specific tags
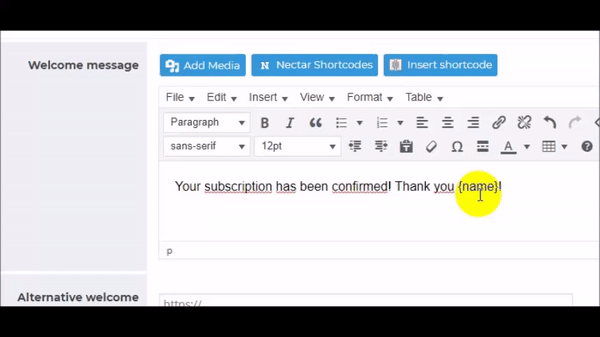
{id}– the subscriber’s unique ID{name}– the subscriber’s name or first name, it depends on how you use that fields during the subscription{surname}– the subscriber’s last name{full_name}– a combination of the name and surname{title}– The subscriber’s title or salutation, like Mr or Mrs, can be configured on the subscription panel{email}– the subscriber’s email{profile_N}– the profile number N as configured on subscription form fields{ip}– the IP from which the subscription has been started; there is who like to add it to the confirmation email
Empty name fallback
The {name} and {full_name} tags now have a fallback, when the name is missing: you can configure it on the Forms/Standard page. For example, you can set the fallback to “subscriber” and write:
Dear {name}
And if the name is empty, it will produce “Dear subscriber”.
About profile fields tags {profile_N}
The {profile_N} tag must be used by changing the “N” to the number of the profile field you want to insert.
For example, if your profile field number 2 is the shoe number and you want to personalize the newsletter content by writing something like “See all our offers for shoes of number [subscriber show number]” you can write the sentence in this way: “See all our offers for shoes of number {profile_2}”.
About the {date_NNN} tag
The {date_NNN} tag allows you to insert a date into your newsletter and format it using standard PHP date format characters.
NNN represents the format string you want to use.
You can use any valid PHP date format letters to control how the date is displayed. All the available combinations of letters to create a format are explained here.
The output is not limited to a simple current date — you can display specific parts of the date such as the year, week number, day name, month name, and many other variations.
For example:
{date_W}
Displays the week number of the year (ISO-8601, uppercaseW).{date_Y}
Displays the current year (4 digits).
The plugin supports all standard PHP date format characters, including:
- Short and long day names
- Short and long month names
- Numeric day and month values
- Week numbers
- Full or partial date representations
In general, the format used inside {date_…} follows the same rules as the PHP date() function.
For example:
{date_d}→ day of the month (two digits){date_M}→ short month name{date_F}→ full month name{date_l}→ full day name
You can find the complete list of available format characters in the official PHP date formatting documentation.
Salutation according to gender
To start a newsletter with a different salutation by gender, you can use a combination of tags {title} and {name}. For example
Good morning {title} {name},
The {title} is replaced with Mr., Mrs., or the texts you set on Forms/Standard fields panel.
Subscription, cancellation, profile page URL tags
Since version 9.0.0, only the tags below are recommended to generate “action” links. Anyway, previous tags are still working; there is no need to replace them.
{confirm_url}– Confirms a subscription, and it’s used only in the confirmation email when the double opt-in is used. It leads the user to the welcome page after changing its status to confirmed. It provides an anti-bot check.{unsubscribe_url}– Starts the unsubscribe process, leading the subscribers to the site where they can confirm. The procedure is designed to block bots. To be used only on newsletters.{profile_url}– Points to the profile editing page.
Company information tags
Company data can be set in Settings>Company Info panel.
{company_name}– the company name from the company info configuration{company_address}– the company address from the company info configuration{company_legal}– the legal text set on company info
Forms
Since version 9.0.0, we discourage the use of the forms-related tags and recommend using the shortcodes like [newsletter_form] and [profile_form] with their attributes to have custom behaviours.
Forms tags are of course specific and can be used only on some pages. They can have different behavior in different contexts.
{subscription_form}– generates the main subscription form and should be used only on the subscription page configurable on the subscription panel{subscription_form_N}– can be used in place of the {subscription_form} to recall the custom form number N{profile_form}– must be used on profile page text (configurable on subscription panel) and generated the form where a subscriber can review and edit his data; I use it even on the welcome page to let the subscriber complete the subscription adding more information
The {subscription_form}, when used on the widget, it is replaced by a different form, with the same field but a different layout (that better adapts to a sidebar).