With the Import/Export Addon for the Newsletter plugin, you can import a list of contacts saved in CSV format and map the CSV columns to the subscriber’s fields. or export your list with a set of filters.
What's inside
- Which data can be imported
- File or copy and paste
- The data format
- Columns to not be imported
- Facebook export and errors
- Subscriber matching
- Import mode
- Import from MailPoet
- Debugging import errors
- Activation and welcome emails
Which data can be imported
- Email (this is of course a required field)
- First name
- Last name
- Gender
- Country
- Region
- City
- All extra profile fields
Lists can be assigned to imported subscribers, not read from the imported data.
There are three import modes: update, overwrite and skip. They’re explained later.
File or copy and paste
Data can be available in a text file (CSV) or can be copied and pasted. Sometimes copy and paste can be the best choice if there are problems with encoding and language-specific characters since the browser converts them automatically.
When using copy and paste, remember to add a first-line with the column names.
The data format
A CSV file can be generated by Excel using the “Save as” feature, or copying and pasting from Excel to a text editor (and saving the file with “csv” extension).
The file must have a first line with the field names (there are no constraints on how the fields are named or their order). For example:
Email;Last name;First name;City
stefano@example.com;Litracus;Stefano;Roma
You can then map those columns to the subscriber’s fields on a special configuration panel during the import process.
The column order is not important since you later will map the columns to the fields.
Last name;Email;First name;City
Litracus;stefano@example.com;Stefano;Roma
Columns to not be imported
If the CSV contains columns not relevant for your import, there are no problems, just don’t map those columns to subscriber fields and they’ll be ignored.
Facebook export and errors
Facebook exports are coded in a special way (UTF-16 LE) and that format can’t be read by this addon. To convert it, just open the Facebook CSV file with Excel and resave it as UTF-8 CSV. Do not use text delimiters.
If an import is not working, probably the file is not in the right format or encoding. So open it with Excel (or equivalent) and export the data in UTF-8 encoded CSV without text delimiters. The field separator can be a semicolon or a tab.
Subscriber matching
The only required field is the email address. It is even used to check if the subscriber is already in your database and, following the “import mode”, the importer treats the data in different ways. See later the “import mode” paragraph.
Import mode
When importing your data can contain emails already registered. You should then select how to treat those already registered subscribers.
- Skip mode – means no action is taken and the impoting data is ignored
- Update mode – the subscriber profile is updated with the new data but old data not involved by the import action is preserved; for example if the extra field 2 is not imported, the original one is kept
- Overwrite mode – the subscriber data is emptied and then refilled with the importing data; that preserves the subscriber id and history (clicks, newsletters received, …) but everything else is blanked (fields, lists, gender, name, …)
Of course, new subscribers are just created.
Import from MailPoet
If you choose the MailPoet option, you can import MailPoet subscribers: you have to decide which lists to consider, the import mode (see above), and the Newsletter lists to assign them.
The status will be mapped, so, for example, confirmed or bounced contacts will keep the status. Please note that Inactive subscribers will be imported as Confirmed.
Debugging import errors
After the import is completed a report is shown with errors and their line number.
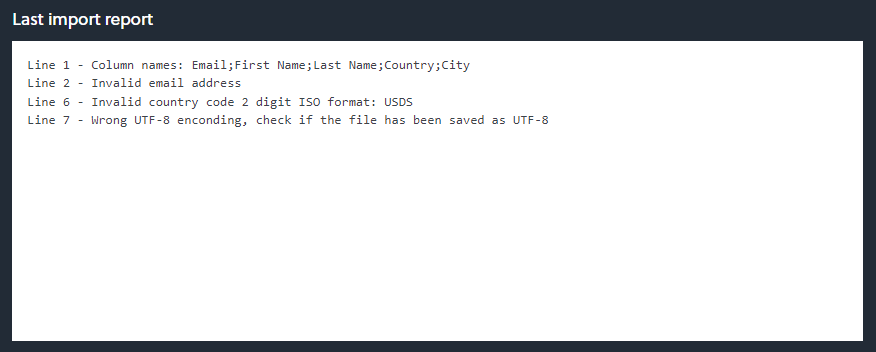
Usually, this report is enough to have a clue for skipped records and how to fix them. More detailed information can be found on log files on System>Logs page where you should find an import-xxx.txt.
If you need even more details of the import process, you can temporarily set the log level to debug on Newsletter main settings and run the import once again. The log file will contain step by step what is happening.
Remember to set the log level to error once finished.
Activation and welcome emails
NO welcome or activation emails are sent during the import.
If you want to ask the subscribers to activate, import them as “not confirmed” and send them a newsletter adding a link or a button using as URL the tag {subscription_confirm_url} inviting them to click it to confirm their subscription.